“Tactile Coatings” – the new all-in-one package for surface finishing with a textured coating.
If you’re serious about opening up new areas of business but don’t want to end up out of your depth, you need a watertight concept...
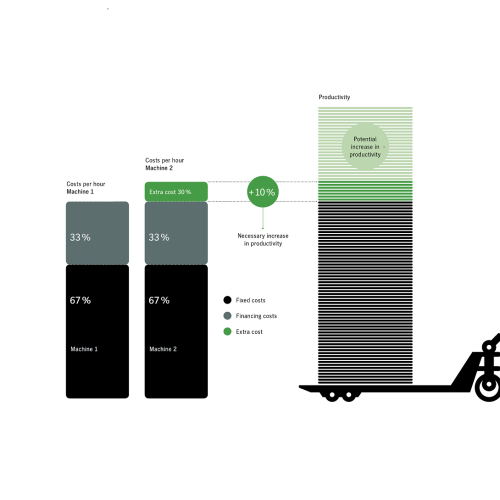
Investing in a new press has consequences for the entire business, so careful selection is vital. In particular, it is important to take a close look at the purchase price...
The perfect way to get started in packaging – the new compact Diana Go folder gluer.
The new FoilStar Cure ensures process stability for inline cold foil finishing in UV label printing.
Digital Services help print shops increase their performance and availability efficiently.